
FileFetch — Documentation
FileFetch setup guide
Install FileFetch, add it to your HubSpot records, and download your first files. About 10 minutes.
Last updated: November 2026
1. Before you start
What you need:
- A HubSpot account on any tier (Free, Starter, Professional or Enterprise). FileFetch works with the free CRM.
- A HubSpot user who can install apps (a Super Admin, or a user with the "App Marketplace Access" permission). Only this person needs to install; everyone else just uses it.
- The files you want must be in HubSpot already: in a file-type property on a record, attached to a record (notes, calls, meetings, tasks), or in the File Manager.
What FileFetch reads: contacts, companies, deals, tickets and custom objects (read only), file metadata and file contents, owners (for owner filters) and your user list (for access control). It never writes to your CRM and never stores your files; downloads go straight to your browser as a zip.
2. Install FileFetch
- Open FileFetch in the HubSpot App Marketplace and click Install app.
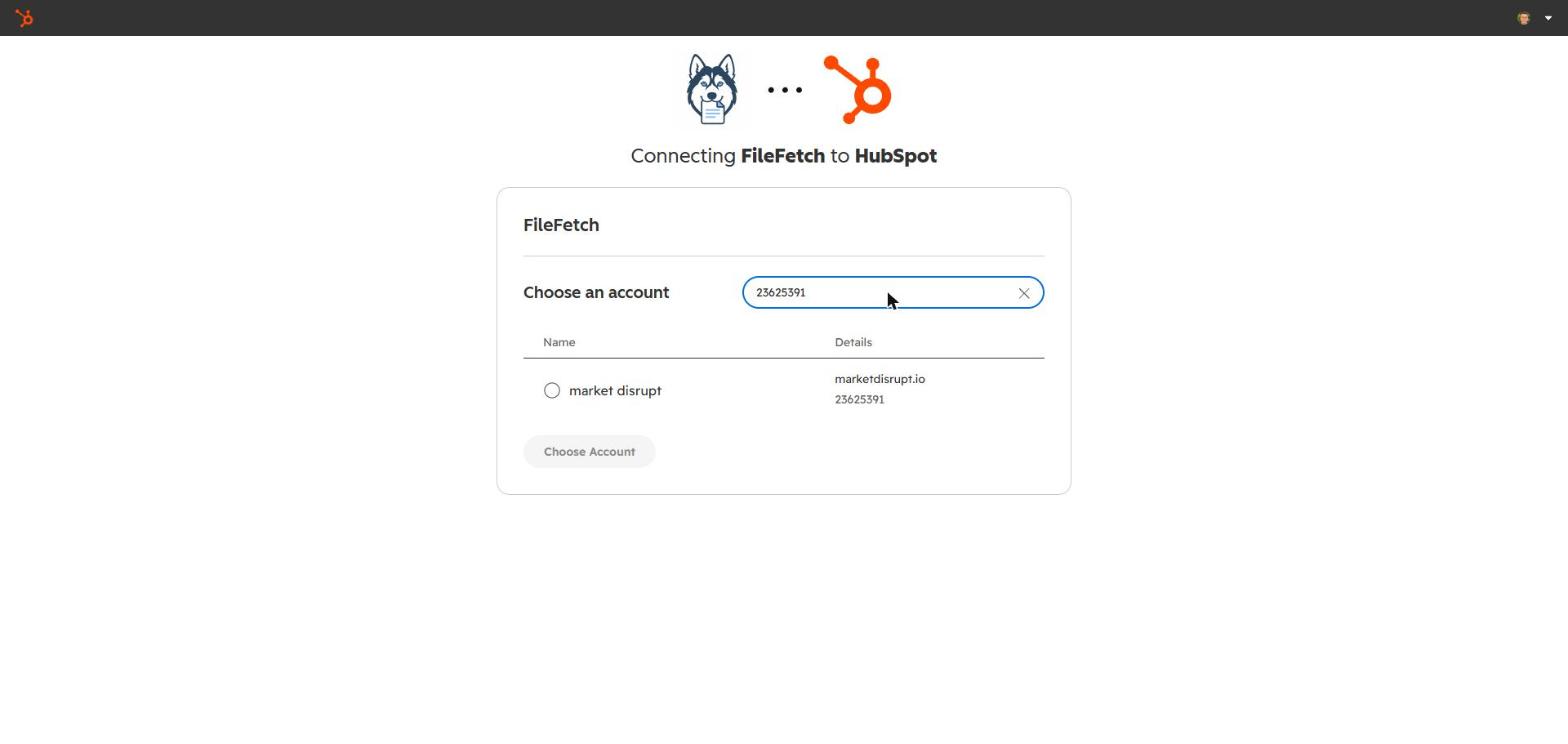
- Choose the HubSpot account to connect, review the requested permissions, and click Connect app.
- FileFetch opens in a new window. Read and accept the Terms of Service.
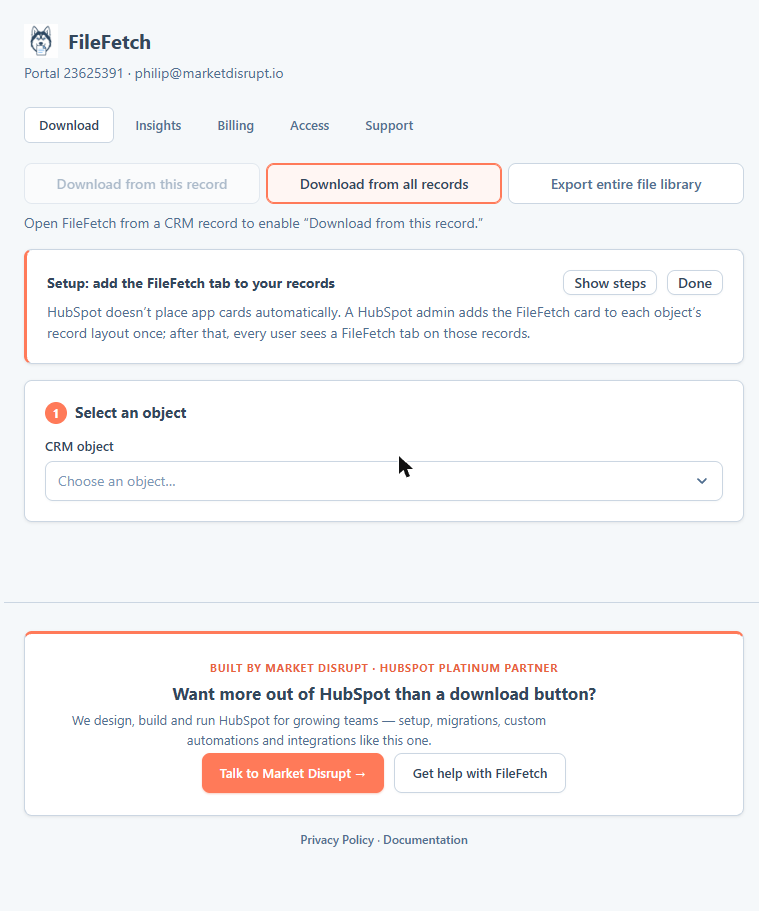
- You land on the FileFetch home screen on the Free plan (100 files a month). No card is needed to install or try it.
Already installed by someone else on your team? Skip to section 4.
3. Add the FileFetch tab to your records (one-time, admin)
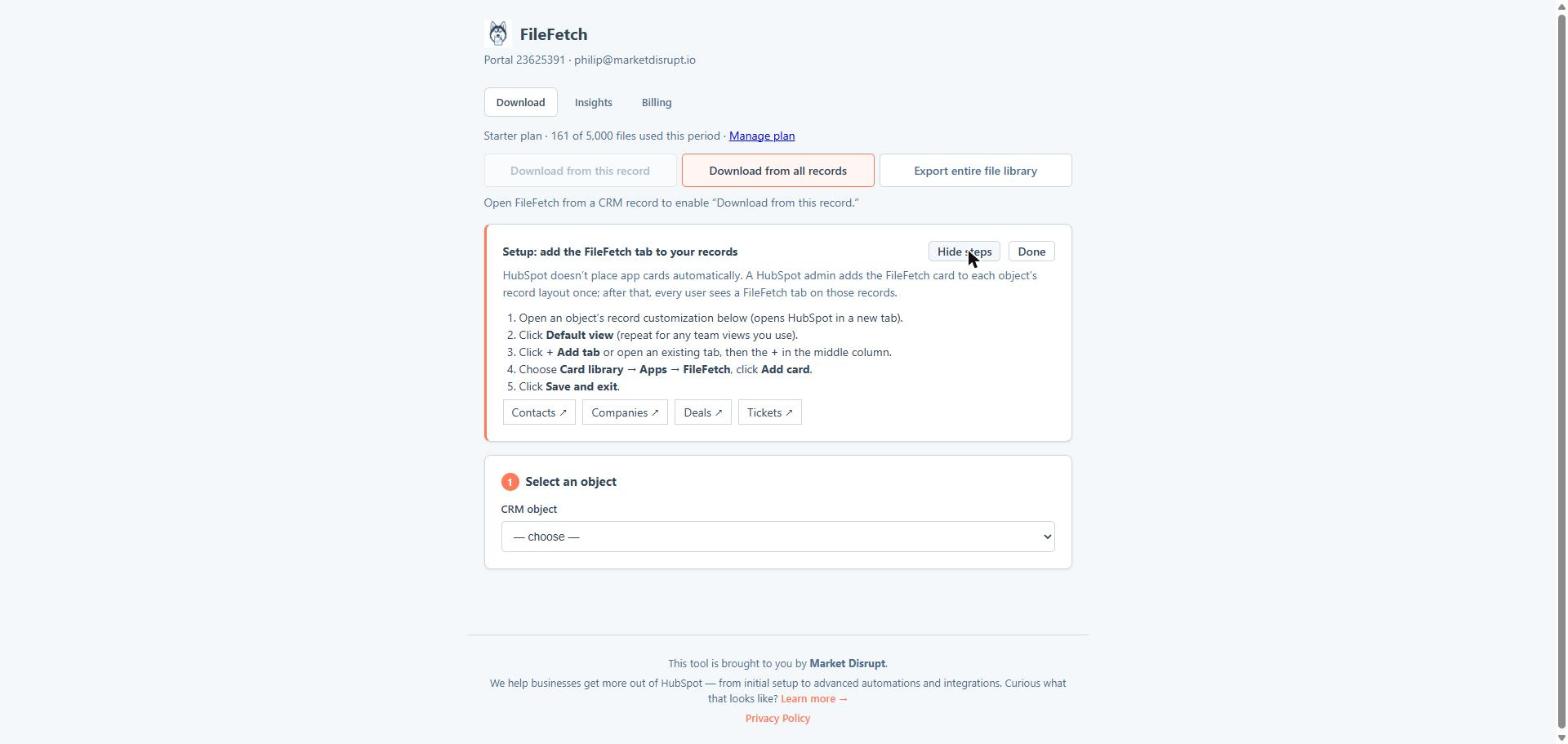
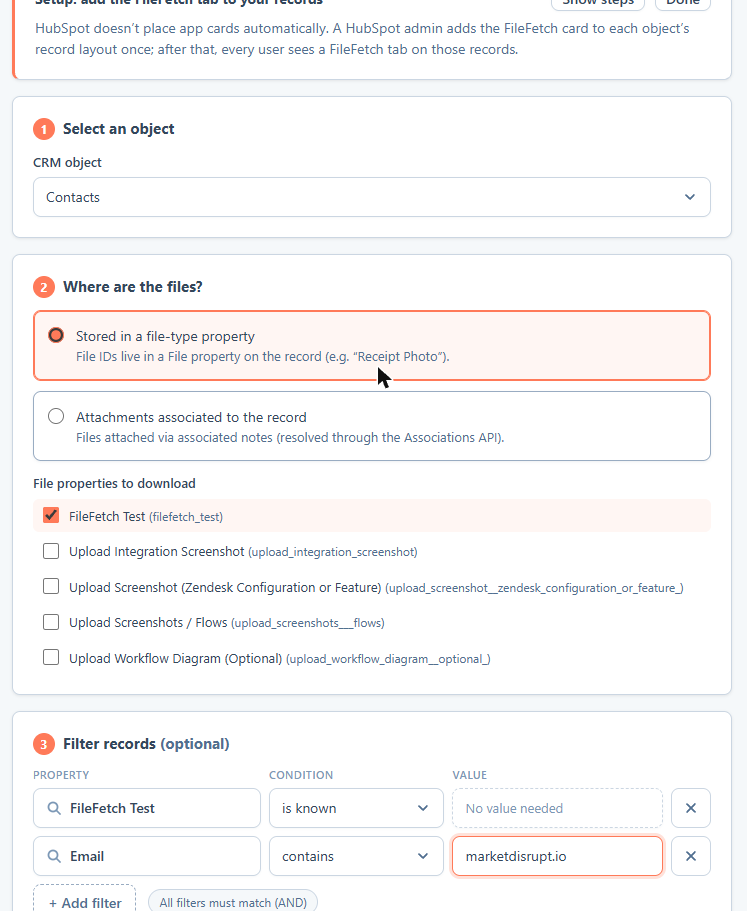
HubSpot doesn't place app cards on records automatically. A HubSpot admin adds the FileFetch card to each object's record layout once; after that every user sees a FileFetch tab on those records.
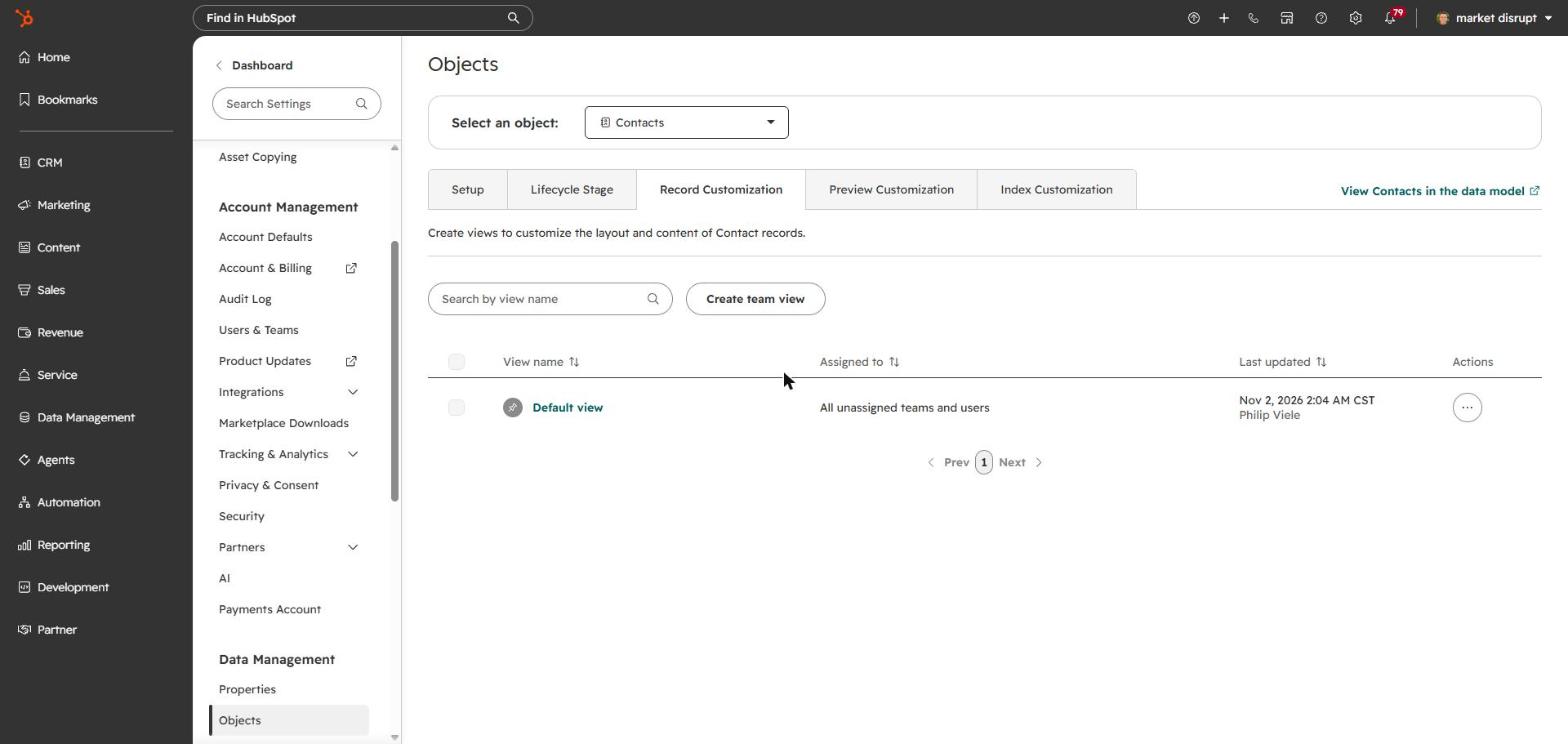
- In HubSpot go to Settings → Objects → Contacts.
- Open the Record customization tab and click Default view (or the view your team uses).
- Click + Add tab and name it "FileFetch", or pick an existing tab.
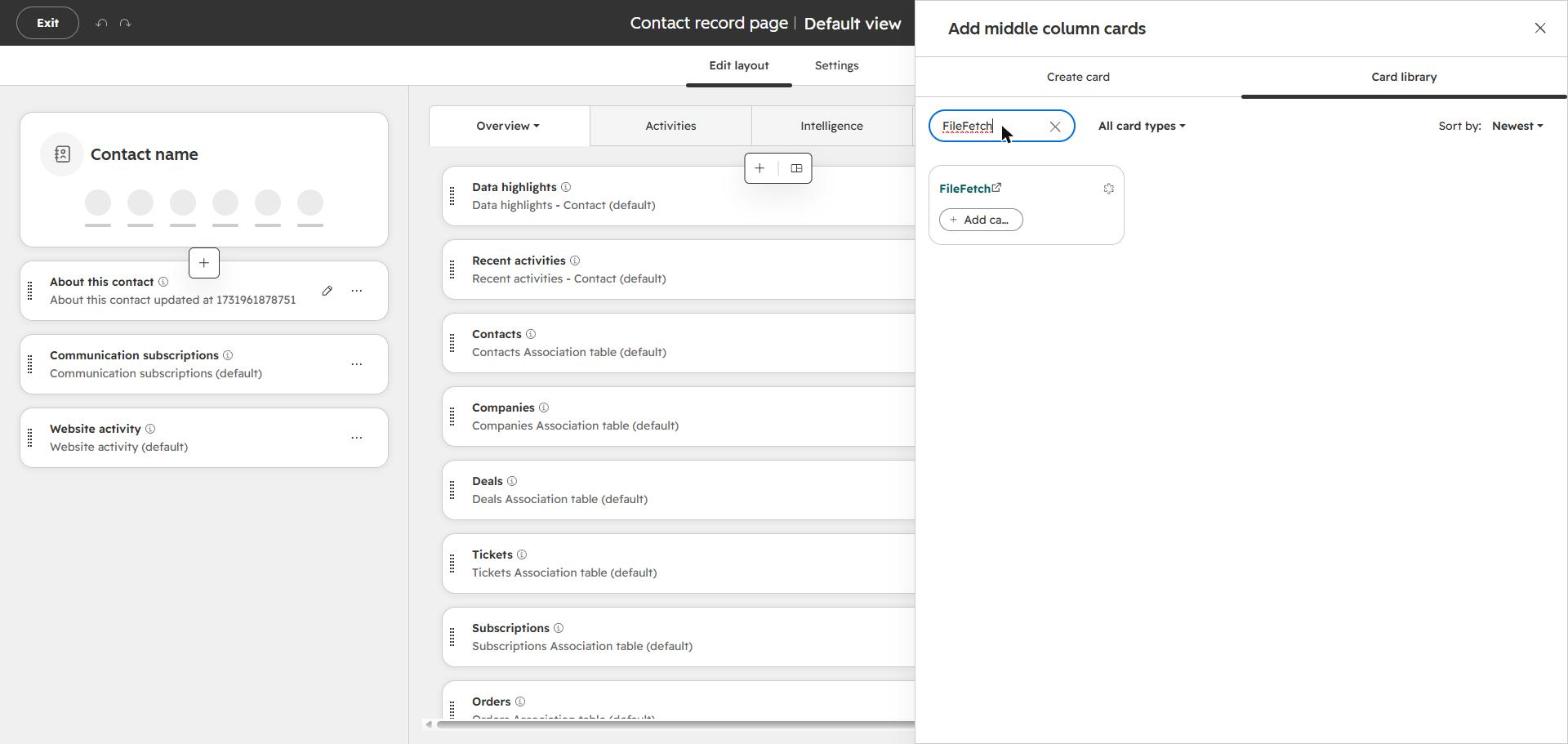
- Click Add card, choose Card library → Apps → FileFetch, and click Add card.
- Click Save and exit.
- Repeat for Companies, Deals, Tickets and any custom object you want to download from.
The in-app Setup checklist on the FileFetch home screen has a direct link to the right settings page for each object.
4. Download the files on one record
- Open any contact, company, deal or ticket in HubSpot.
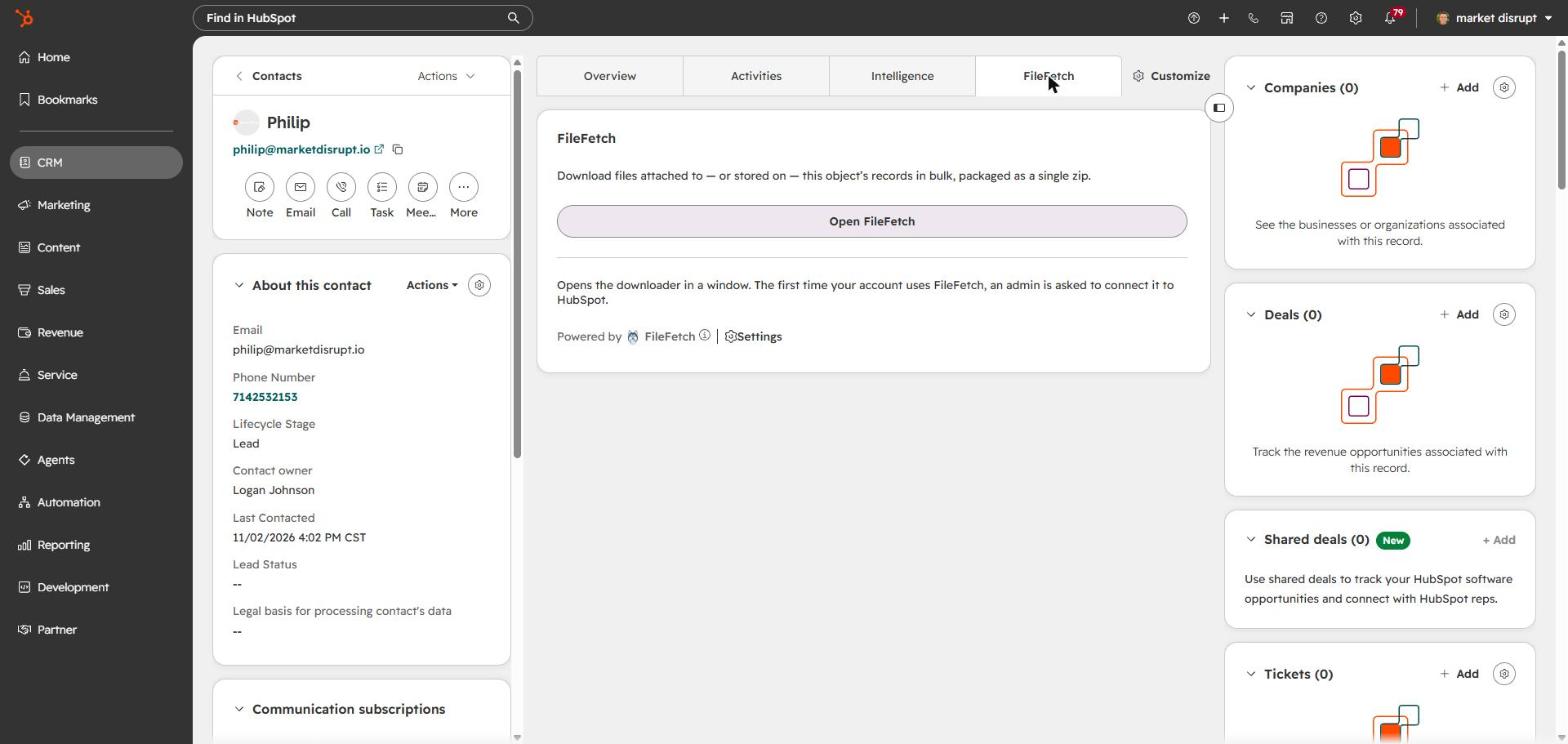
- Click the FileFetch tab, then Open FileFetch.
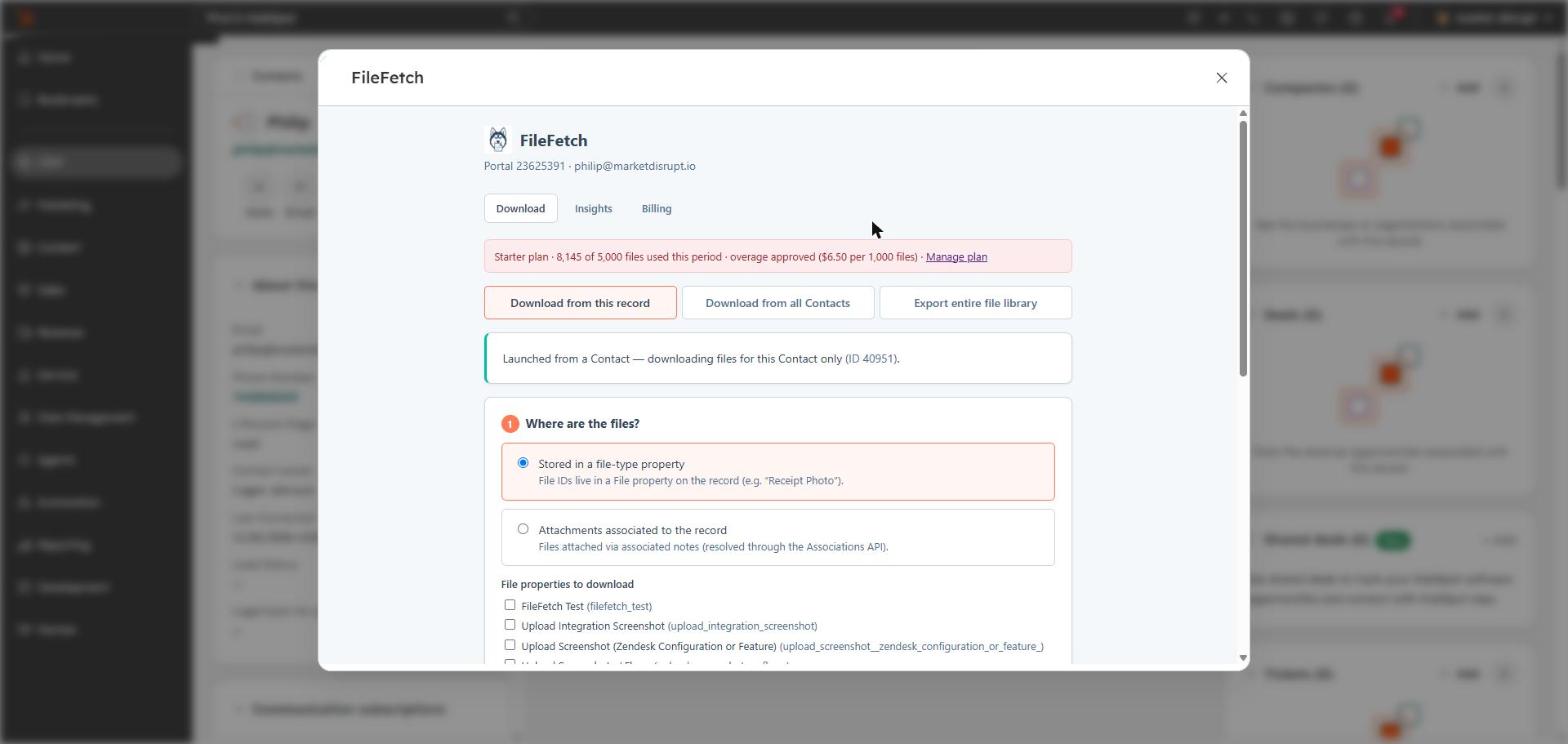
- Under "Where are the files?" choose:
- Stored in a file-type property: tick the file properties to pull (for example "Receipt photo" or a form upload field).
- Attachments associated to the record: files attached to the record's notes, calls, meetings and tasks.
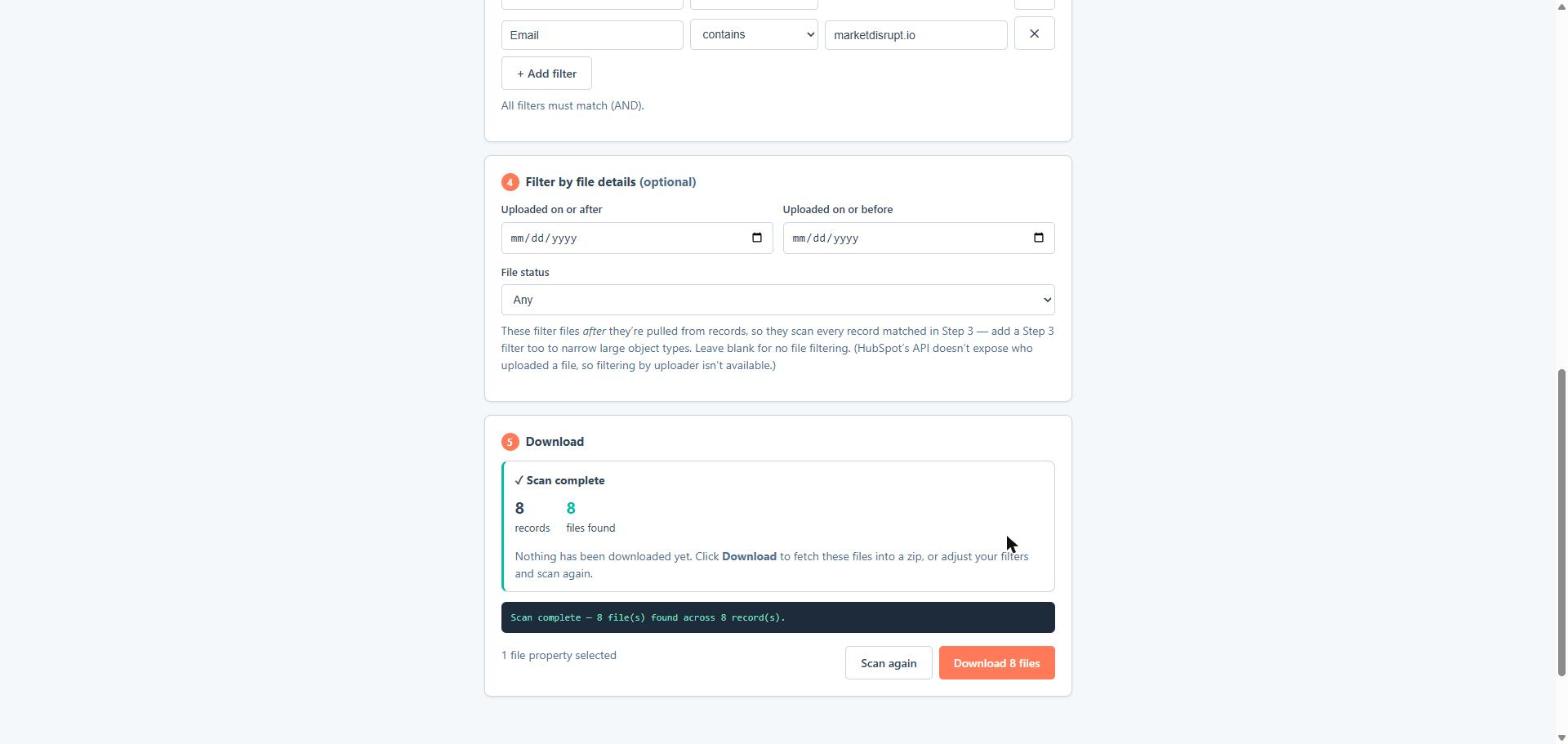
- Click Scan for files. FileFetch shows exactly how many files it found. Nothing is downloaded yet.
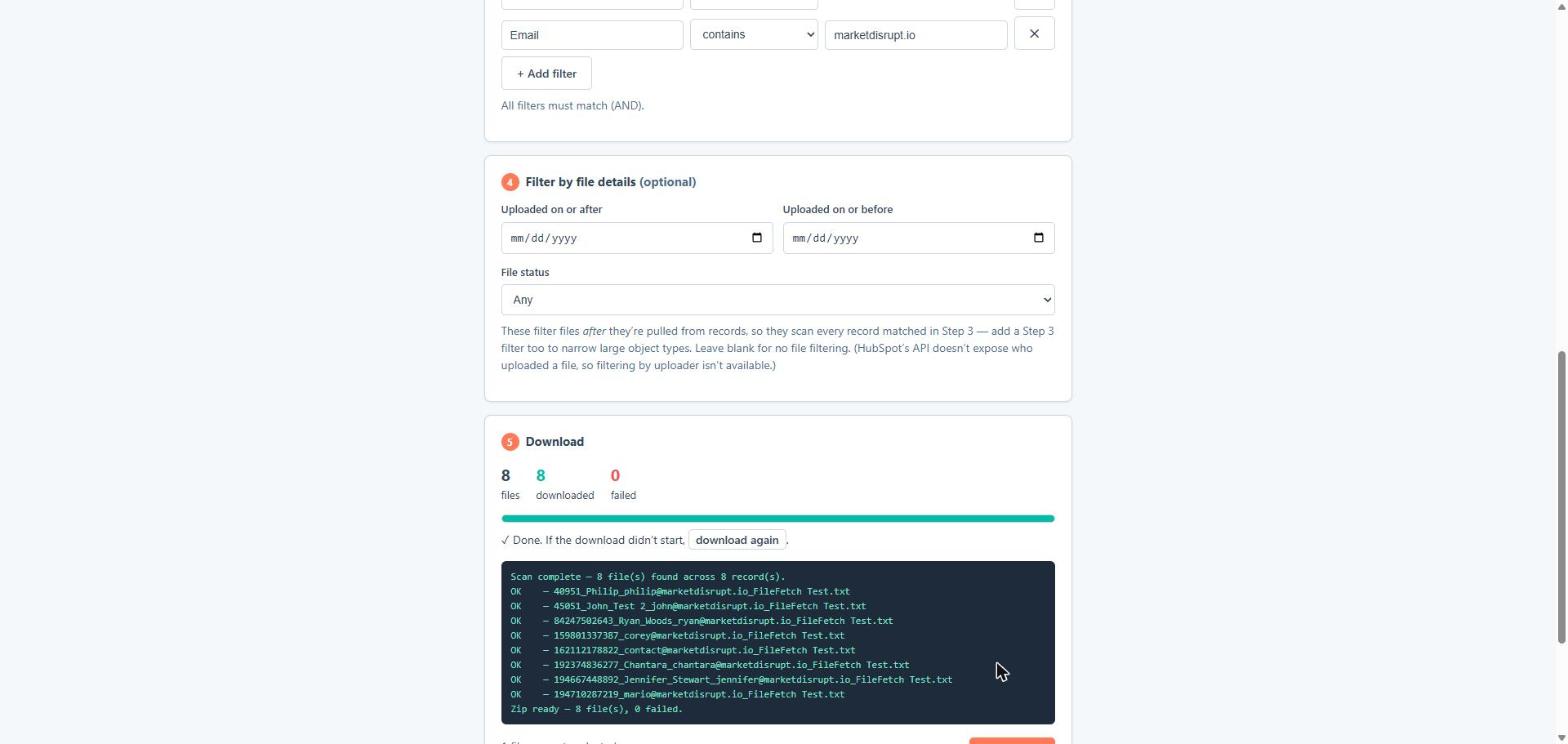
- Click Download. Your browser saves one zip. Each file is named after the record (record ID, then the name, email or deal name) so you can tell what belongs to whom.
5. Download files from many records at once
- Open FileFetch from any record's FileFetch tab and click Download from all records, or go to Settings → Integrations → Connected apps → FileFetch → Open FileFetch.
- Step 1: pick the object (contacts, companies, deals, tickets or a custom object).
- Step 2: choose the file source, as in section 4.
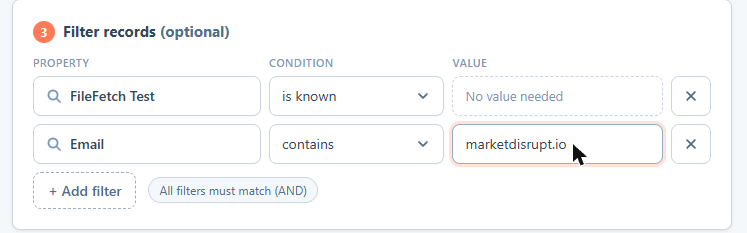
- Step 3 (optional): add record filters, the same way you build a HubSpot list: pick a property, a condition (is, contains, is after, is known, and so on) and a value. Add as many rows as you need; records must match all of them. Leave this empty to scan every record of that object.
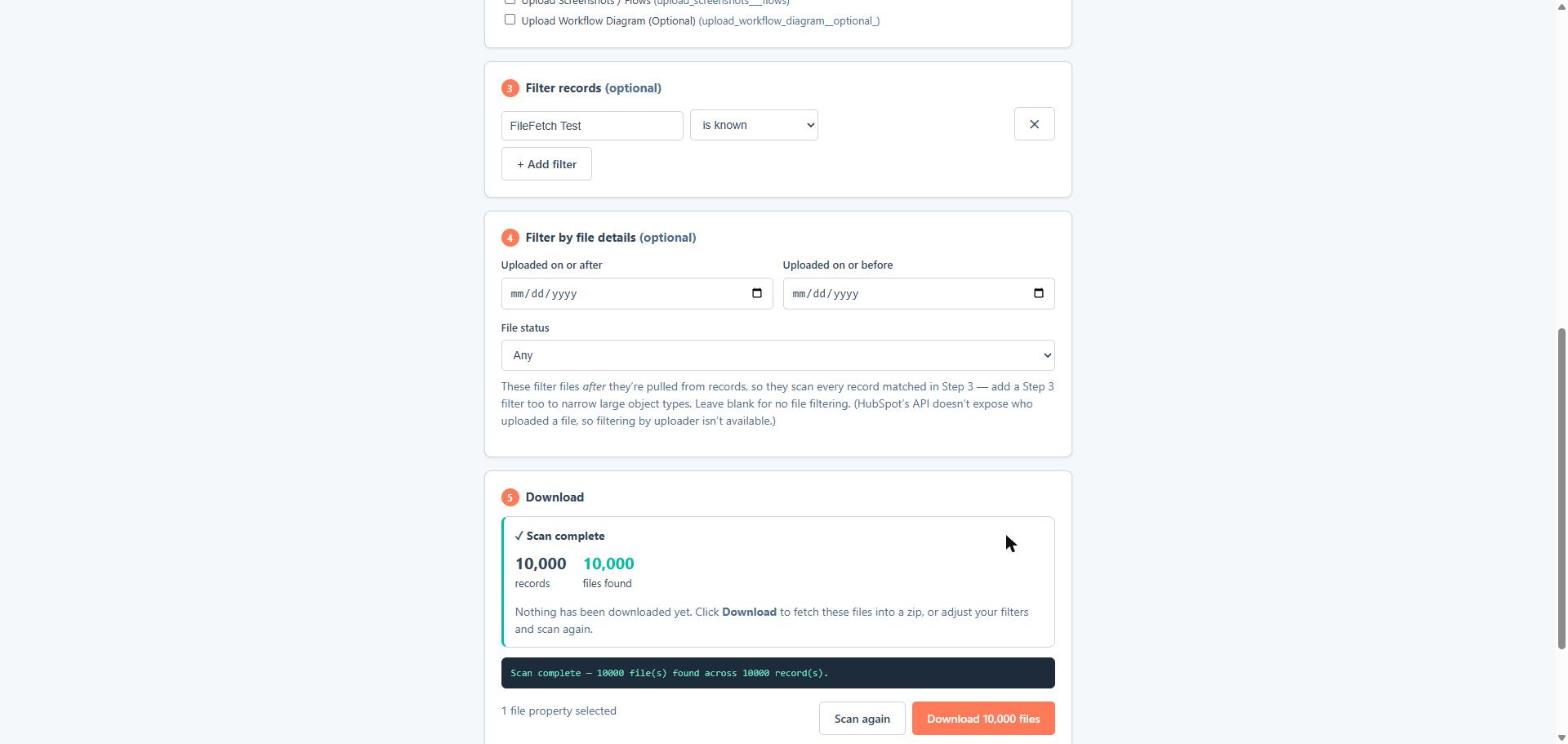
- Step 4 (optional): filter by file details: uploaded on or after, uploaded on or before, file status.
- Click Scan for files, check the record and file counts, then click Download.
Good to know:
- There is no 10,000-record ceiling. FileFetch pages through HubSpot's search in windows, so a 50,000-record scan works; it just takes longer.
- Very large downloads are split into zip parts (about 400 MB or 2,500 files each). Each finished part gets its own Save part button, because browsers often block a second automatic download. Keep the tab open until every part is saved.
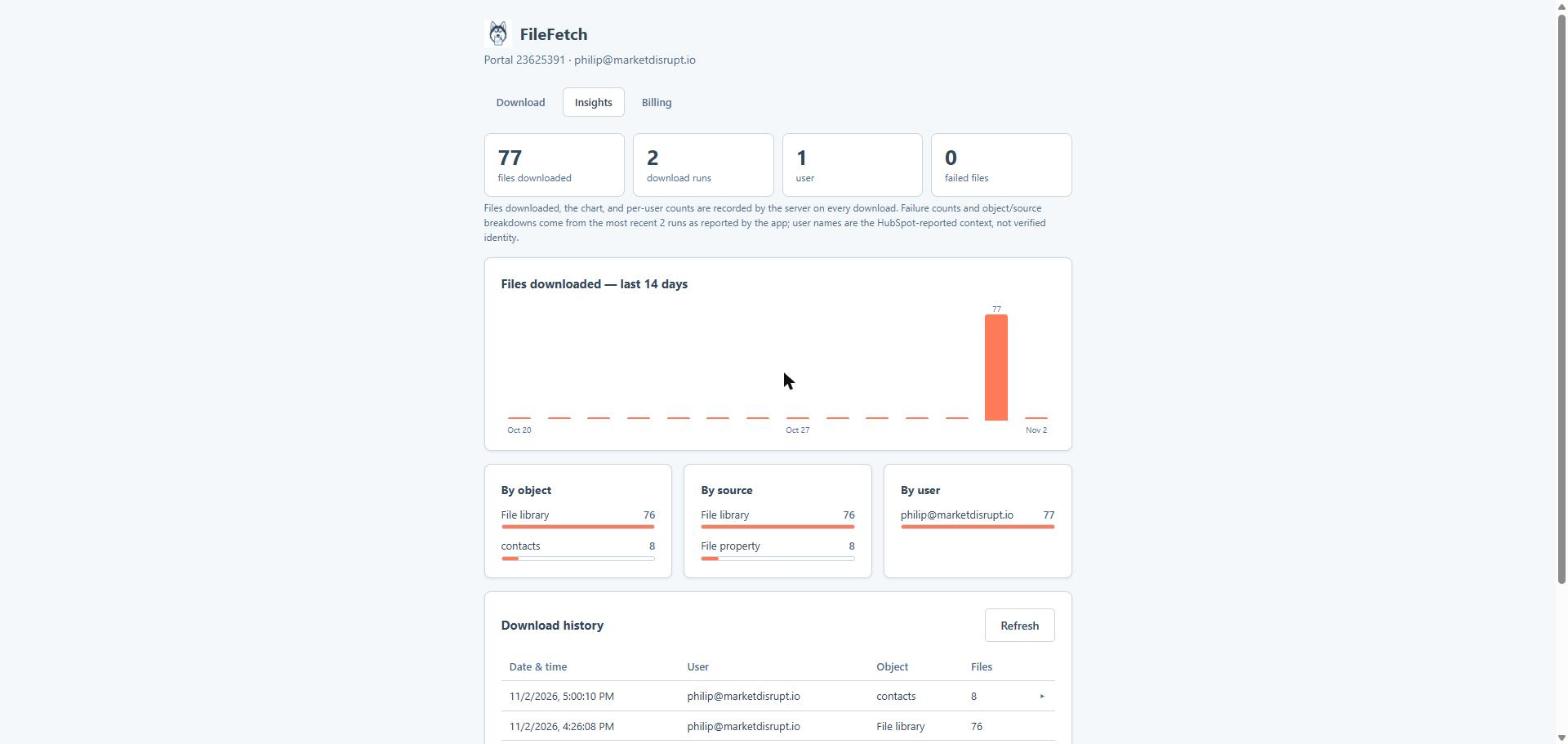
- Each download run is logged on the Insights tab: who ran it, which object, how many files.
6. Export your entire File Manager
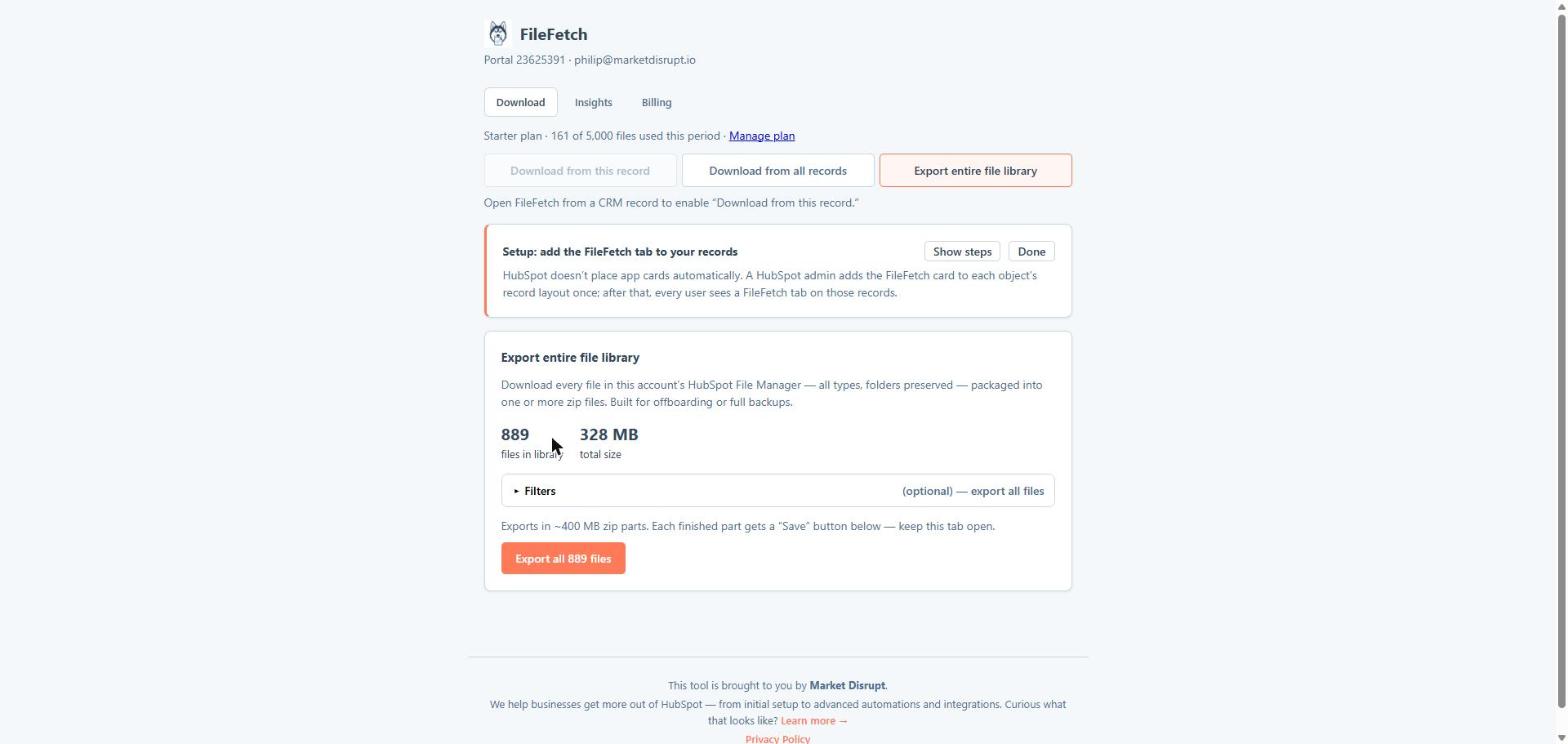
- On the FileFetch home screen click Export entire file library.
- Click Scan library. FileFetch counts every file in the File Manager.
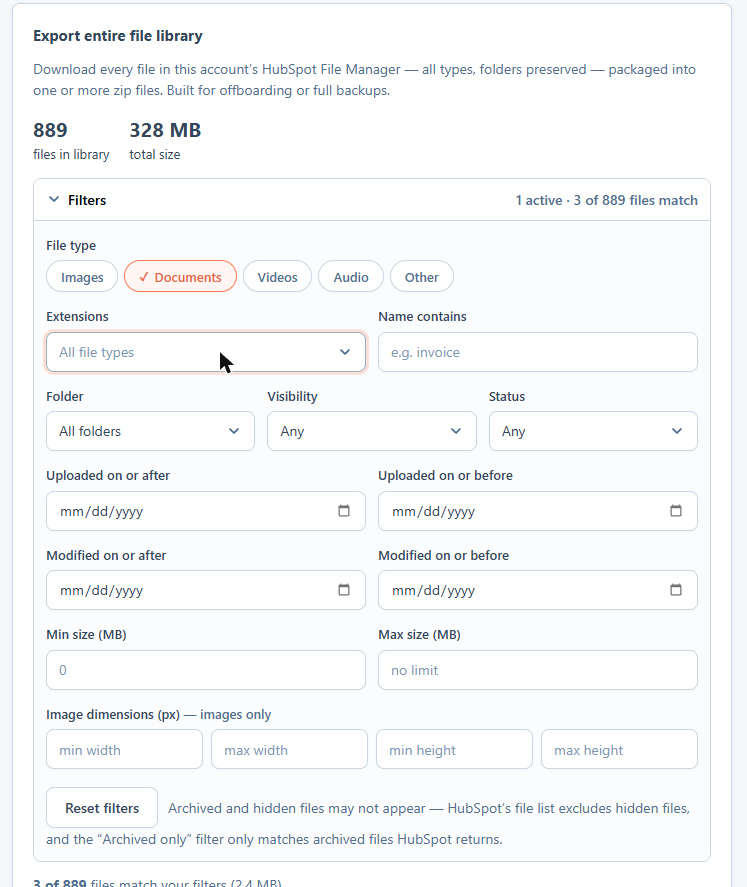
- Optional: open Filters to limit by folder, file type, upload date or status.
- Click Export. The library downloads as numbered zip parts with the folder structure preserved inside each zip. Save every part before leaving the page.
7. Plans, allowances and overage
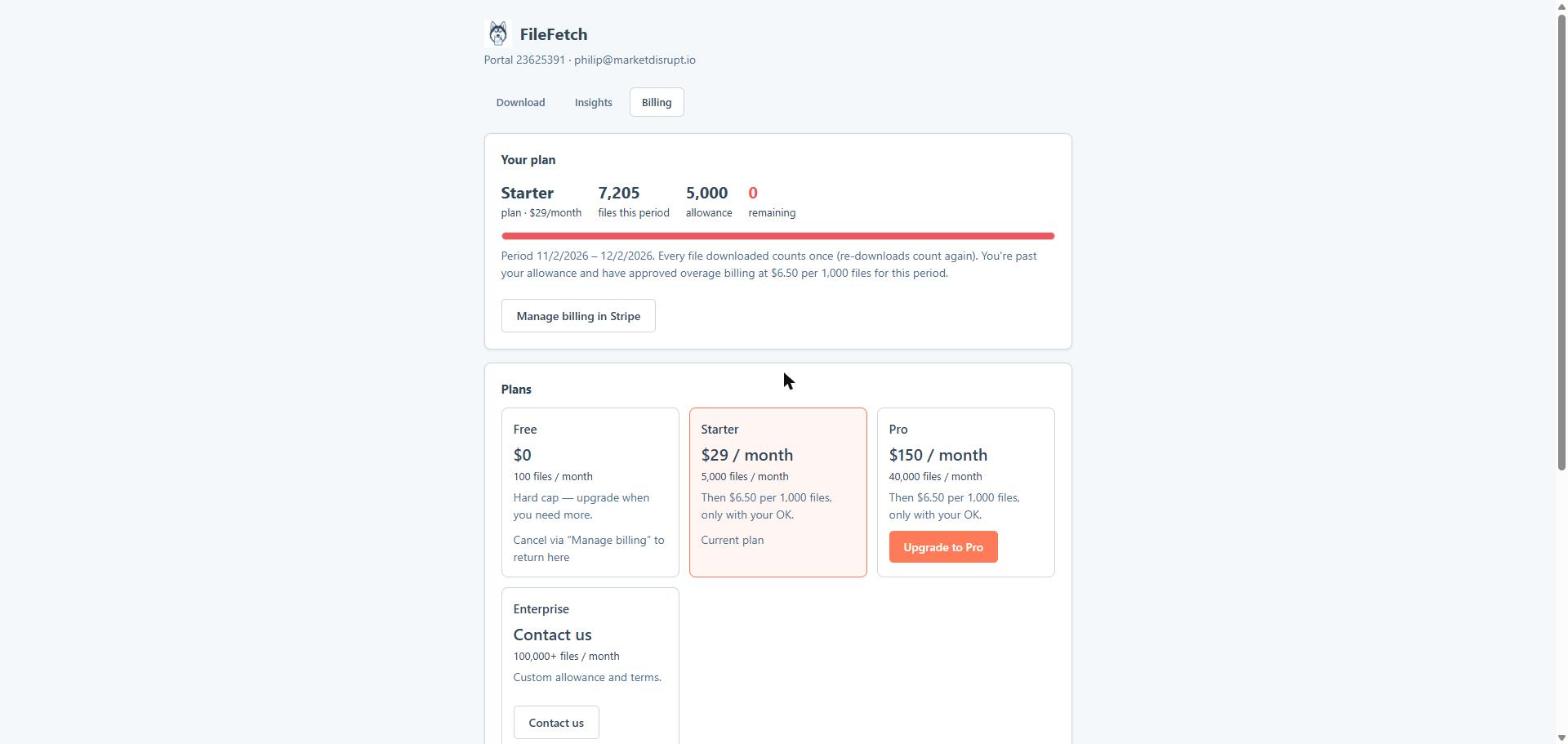
- Free: 100 files a month. When you reach it, downloads pause with an upgrade prompt.
- Starter: $29 a month (or $290 a year), 5,000 files a month.
- Pro: $150 a month (or $1,500 a year), 40,000 files a month, plus access control.
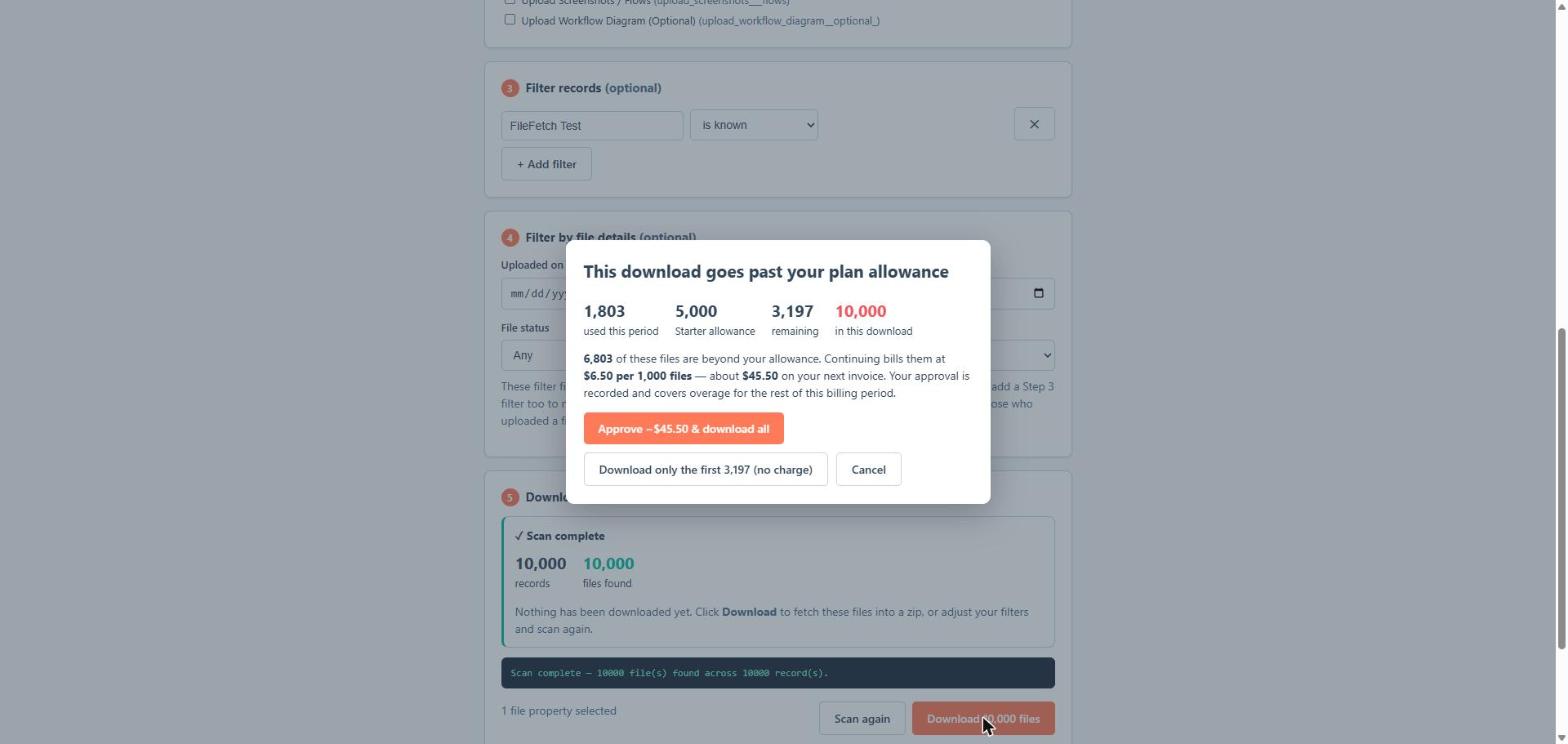
- Starter and Pro can go past the monthly allowance at $6.50 per 1,000 extra files, but only after a user approves it: FileFetch shows the usage and estimated charge before a run that would exceed the allowance, and you can choose to download only what's left in the allowance instead. Overage is billed on the next invoice.
- Every file counts once per download; downloading the same file twice counts twice.
- Upgrade, change plan or cancel on the Billing tab inside FileFetch. Billing is through Stripe. Full pricing: FileFetch pricing.
8. Access control (Pro)
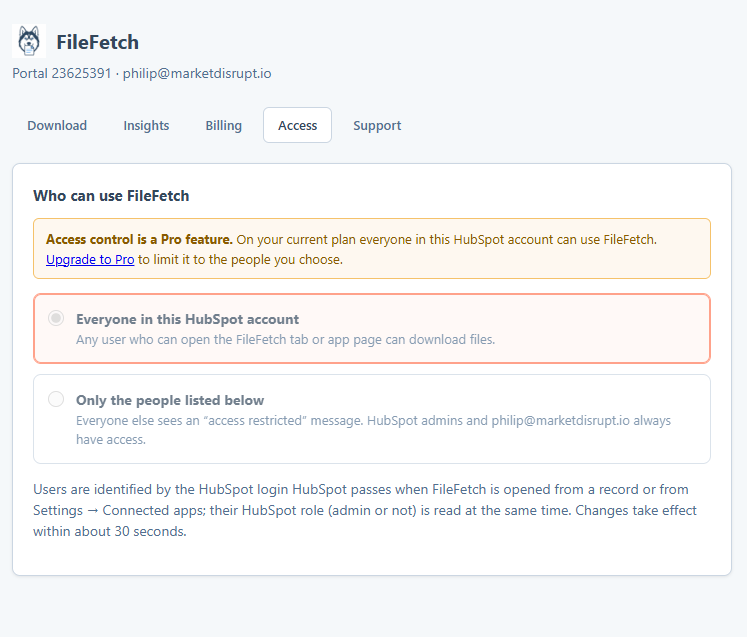
By default any user in your HubSpot account who can see a record can open FileFetch from it. On Pro, the Access tab lets a Super Admin, Partner Admin or the user who installed the app restrict FileFetch to a list of named users. If you set this up before the app was reconnected with the latest permissions, click Reconnect HubSpot on the Access tab once.
9. Uninstall
Go to Settings → Integrations → Connected apps, open the FileFetch actions menu and choose Uninstall. FileFetch deletes the account's tokens, download logs and billing records within 24 hours. An active paid subscription is cancelled at the same time; you keep what you have already downloaded.
10. Troubleshooting
- I don't see a FileFetch tab on records. The card hasn't been added to that object's record layout yet (section 3), or you are looking at a custom view that doesn't include it.
- "FileFetch is no longer connected to this HubSpot account." The app was uninstalled or the connection revoked. Reinstall from the Marketplace or click Connect HubSpot.
- "HubSpot says FileFetch isn't allowed to do this." The connection predates a permission the current version needs. Open FileFetch and click Reconnect HubSpot to grant it.
- "The filter on … needs a value." A Step 3 filter row has a condition that needs a value but the value is empty. Fill it in or remove the row.
- A file fails with "HubSpot has no file with this id." The file was deleted from the File Manager after it was attached. The rest of the run continues; the failed file is listed in the log.
- Only the first zip downloaded. Your browser blocked the automatic downloads after the first one. Use the Save part buttons on the Download screen.
- Files on emails aren't included. Attachments on logged emails need an email-reading permission FileFetch deliberately doesn't request. Files on notes, calls, meetings and tasks are included.
Need help?
Email contact@marketdisrupt.io with your HubSpot account ID (shown at the top of FileFetch) and, for a failed run, the time it happened. We usually reply within one business day.
Related: Terms of Service · Privacy Policy · Open FileFetch